Quick Overview
- A compression test checks engine health. It measures the squeeze inside the cylinder.
- Most healthy push mower engines read 90-120 psi (Briggs & Stratton, 2024). [VERIFY: current spec range]
- Low compression often means worn rings. It can also mean a bad valve or a blown head gasket.
- You need a compression tester with the right thread size. Most small engines use 14mm.
- A wet compression test tells you which repair you’re facing. Rings or valves.
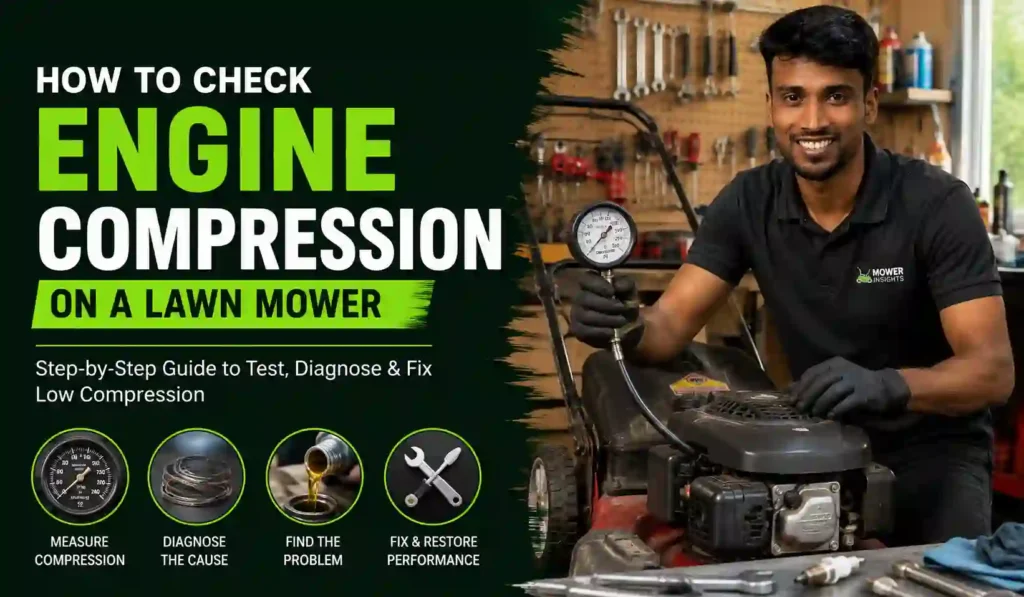
What “Engine Compression” Actually Means
Engine compression is the squeeze inside the cylinder. The piston pushes air tight. This happens right before the spark fires. More squeeze means more power. Low squeeze means a weak engine.
Think of it like a bike pump with a leaky valve. Push the handle down. Air should build pressure fast. A leaky valve lets that pressure escape. A worn engine does the same thing inside the cylinder.
This guide shows you how to test that squeeze yourself. It takes about 25 minutes. You need one main tool. A compression tester.
The gauge reads in psi. That stands for pounds per square inch. It’s the same unit used for tire pressure, just at a much higher number. A car tire might read 32 psi. A mower engine at peak compression can read 90 psi or more, for a split second during cranking.
Why Compression Fades Over Time
Engines lose compression slowly, through normal wear. Three parts wear down the most.
The piston rings seal the piston against the cylinder wall. They wear thin over years of use. A worn ring lets air slip past the piston instead of getting compressed.
The valves open and close to let air in and exhaust out. A valve can burn, warp, or get carbon stuck on its seat. Any of these stop it from sealing fully.
The head gasket seals the top of the cylinder to the engine block. Heat and age can crack or flatten this gasket. A blown gasket lets pressure escape sideways instead of pushing the piston.
All three cause the same symptom: hard starting or a weak-running engine. A compression test, especially the wet test in Step 9, tells you which one you’re dealing with.
Types of Compression Testers
There are two main styles of compression tester. Each works a bit differently.
A screw-in tester threads into the spark plug hole like a bolt. It seals with metal threads. This type gives the most consistent reading. It’s the type I use in my shop.
A push-in tester presses into the hole and holds with a rubber cone. It’s faster to use. It can seal less consistently on some engines. Small differences in seal quality can shift your reading by a few psi.
For a small engine like a mower, either type works fine for a basic check. If you want the most accurate number, choose a screw-in tester.
How Engine Size Changes a “Normal” Reading
Not every mower engine has the same spec. A small 140cc push mower engine and a large 500cc+ riding mower engine don’t compress air the same way.
Smaller engines often run lower peak numbers. Larger engines often run higher peak numbers. This is normal. It’s about the size of the cylinder, not the health of the engine.
This is why the spec sheet step matters so much. Don’t compare your reading to a number you saw online for a different engine. Compare it to the number listed for your exact model.
| Engine Type | Typical Compression Range | Notes |
|---|---|---|
| Small push mower (under 175cc) | 60-100 psi | Wide range across brands |
| Standard push mower (175-225cc) | 90-120 psi | Most common residential size |
| Riding mower / zero-turn | 100-150 psi | Larger displacement engines |
How This Guide Was Put Together
I run these tests every week in my repair shop. This guide covers the exact steps I use on customer mowers. It also covers the mistakes I see homeowners make most often. The wet test method here is the same one I use to decide between a ring job and a valve job.
Quick Answer
Pull the spark plug first. Thread in a compression tester. Ground the spark plug wire. Prop the throttle wide open. Pull the starter cord hard. Do this 4 to 6 times. Read the gauge’s top number. Compare it to your engine’s spec sheet. Most healthy push mowers read 90 psi or higher.
What You’ll Need
- Compression tester with 14mm and 10mm adapters: This is the main tool. It threads into the spark plug hole. A basic kit costs $15 to $25 (Amazon, 2026). [VERIFY: current price]
- Spark plug socket: You need this to remove the plug. Most mowers use a 5/8-inch socket.
- Ratchet or wrench: This turns the spark plug socket.
- Clean rag: Wipe debris away from the plug area first.
- Owner’s manual or engine spec sheet: This lists your engine’s normal compression range.
- Work gloves: These protect your hands. Cranking pulls the cord hard and fast.
- Notepad or phone: Write your reading down right away. It’s easy to forget the number.
[IMAGE PLACEHOLDER: Siddik’s workbench with a compression tester, spark plug socket, and small engine spec sheet laid out side by side]
Before You Start: Safety Notes
Compression testing means pulling the starter cord hard. The blade sits under the deck. Follow these rules every time.
- Disconnect the spark plug wire before you touch near the blade.
- Never test compression with the mower tipped over grass or dirt.
- Keep hands and feet clear of the blade area at all times.
- Wear gloves. The cord can snap back fast. It can pinch skin.
- Work on a flat, hard surface. Not a slope. Not grass.
- If the fuel tank is very full, some fuel may seep out when you tip the mower for the wet test step. Keep a rag nearby.
Step 1: Let the Engine Cool
Never test a hot engine. Heat changes the reading. It can also burn your hands on the muffler. Let the mower sit for at least 15 minutes after use. A cold or warm engine gives you a more accurate number.
Time estimate: 15 minutes of waiting, no active work.
Step 2: Clean Around the Spark Plug
Dirt and grass clippings collect near the plug. Wipe this area with a rag first. Debris can fall into the cylinder once the plug is out. That debris can scratch the cylinder wall. A clean plug bay protects the engine during the test.
Time estimate: 2 minutes.
Step 3: Remove the Spark Plug
Pull the spark plug wire off the plug. Set the wire aside. It should not touch any bare metal yet. Fit your spark plug socket over the plug. Turn it counterclockwise. Remove the plug all the way. Set it somewhere clean and flat.
Look at the plug’s tip before you set it down. Its color tells you things too. A tan color is normal. Black and sooty often means a rich fuel mix. Oily and wet often means worn rings, the same problem this test checks for.
Time estimate: 3 minutes.
Step 4: Ground the Spark Plug Wire
This step matters more than people think. It stops the engine from sparking during the test. A stray spark near open fuel vapor is a real fire risk on a mower with a full tank.
Touch the wire’s metal clip to a bare metal part of the engine. The metal frame or a bolt head works well. Do not let the clip touch anything flammable, including spilled fuel or grass clippings.
Time estimate: 1 minute.
Step 5: Thread in the Compression Tester
Check your tester’s adapter size first. Most walk-behind mower engines use a 14mm spark plug thread. Some older or smaller engines use 10mm.
Screw the tester into the spark plug hole by hand. Turn it clockwise. Do not use a wrench for this part. Hand-tight is enough to seal it. A cross-threaded hole is an expensive mistake. It can mean a new cylinder head.
Time estimate: 2 minutes.
Step 6: Open the Throttle and Choke
Set the throttle lever to full open. Some mowers label this “fast” or “run.” Set the choke to “run” too, not “choke.”
This matters for one reason. An open throttle lets the engine pull in a full breath of air on each pull. A closed throttle starves the engine of air. It gives you a false low reading, even on a healthy engine.
Time estimate: 1 minute.
Step 7: Pull the Starter Cord
Grip the starter cord handle firmly. Pull it hard and fast, all the way out. Do this 4 to 6 times in a row. Don’t stop after one or two pulls. Compression builds with each stroke.
Watch the gauge needle as you pull. It climbs with each pull. Then it levels off. That top number is your reading. Write it down right away, before you forget it.
Time estimate: 2 minutes.
[IMAGE PLACEHOLDER: Siddik pulling the starter cord on a mower with a compression tester threaded into the spark plug hole]
Step 8: Read and Record the Number
Most healthy push mower engines land between 90 and 120 psi (Briggs & Stratton, 2024). [VERIFY: spec range for your exact engine model and displacement] Riding mower engines often run higher than push mowers. Check your engine’s spec sheet for the exact number that applies to your model.
Write your reading down. Compare it to spec. A number close to spec is a good sign. A number well below spec means more testing is needed.
Time estimate: included in Step 7.
Step 9: Run a Wet Test If the Reading Is Low
A low reading needs one more test. This second test tells you what’s actually wrong inside the engine. It splits two very different problems apart.
Add one teaspoon of engine oil into the spark plug hole. Thread the compression tester back in. Pull the cord 4 to 6 more times, just like before. Read the gauge again and write down the new number.
If the number jumps up a lot, the piston rings are worn. The oil is temporarily sealing the gap between the rings and the cylinder wall. If the number barely changes, a valve is the more likely problem. Oil does not fix a leaking valve. This one extra test can save you a full teardown just to guess at the cause.
Time estimate: 5 minutes.
The wet test works because oil is thicker than air. Oil temporarily fills tiny gaps around worn rings. That extra seal traps more pressure during the pull. A valve problem is different. Oil poured into the cylinder doesn’t reach a leaking valve up top. So a valve leak stays a leak, wet test or not. That’s the whole logic behind why this simple test can tell two very different problems apart.
| Wet Test Result | Likely Problem |
|---|---|
| Pressure rises 15+ psi | Worn piston rings |
| Pressure stays about the same | Bad or burnt valve |
| Pressure still very low either way | Blown head gasket or cracked cylinder |
Step 10: Reinstall the Spark Plug and Wire
Remove the compression tester from the hole. Thread the spark plug back in by hand first. This avoids cross-threading the hole. Tighten it with your socket. Snug is enough. Don’t force it.
Push the spark plug wire back onto the plug firmly. It should click into place. Give it a gentle tug to check the seat.
Time estimate: 3 minutes.
What the Numbers Actually Mean
A reading close to your engine’s spec means the engine is healthy. That’s good news for whatever else you’re troubleshooting. A reading 25% or more below spec signals real, mechanical wear inside the engine.
A reading under 60 psi on most small engines usually means the mower will struggle to start at all (Briggs & Stratton, 2024). Below that number, cranking alone often can’t build enough pressure to fire the engine.
In my shop, this is one of the first tests I run on a “won’t start” mower. It rules out fuel and spark problems fast. If compression is low, no amount of carburetor cleaning fixes it. I’ve had customers spend money on a new carburetor kit first, then bring the mower back still broken. A five-minute compression test up front would have saved that cost.
Common Mistakes That Cause a Bad Reading
I see the same errors over and over on customer mowers and DIY attempts. Here are the ones that throw off a compression test the most.
- Testing a hot engine. Heat expands metal parts. This skews the number, sometimes high and sometimes low.
- Leaving the throttle closed. This starves the engine of air during cranking. It reads falsely low, even on a good engine.
- Cross-threading the tester. Forcing the tester in strips the threads. This turns a simple test into a real repair.
- Not pulling hard enough. A weak, slow pull never builds full pressure in the cylinder. Pull fast and firm every time.
- Skipping the wet test. Without it, you’re guessing between two very different repairs. One is cheap. One is not.
- Using the wrong adapter size. A 10mm tester will not seal in a 14mm hole. The reading will be way off, or the gauge won’t hold air at all.
- Testing with old, stale fuel in the tank. This won’t affect compression directly, but it can mask other problems that look like low compression at first.
- Reading the gauge on the first pull. The number climbs with each pull and levels off later. Reading too early gives you a number lower than the engine’s real peak.
- Forgetting to reset the gauge between tests. Most testers have a small release valve. Press it to reset to zero before you start a new pull sequence. Otherwise the needle just holds the old high number.
- Ignoring a fouled spark plug first. A badly fouled plug can make an engine act like it has low compression, even when it doesn’t. Glance at the plug’s condition in Step 3 before you draw conclusions from the gauge alone.
When to DIY vs. When to Call a Professional
A compression test itself is simple. Most homeowners can do it with basic tools and no prior experience. The harder decision comes after you have the number in hand.
Do it yourself if:
- You just want to confirm engine health before starting another repair.
- The reading is close to spec and the mower runs fine otherwise.
- You’re comfortable removing a spark plug and reading a gauge.
- You want to rule out compression before buying carburetor or ignition parts.
Call a professional if:
- The reading is far below spec and you’re not sure why.
- The wet test points to a valve or head gasket problem.
- The engine has good compression but still won’t run right.
- You’d need to remove the cylinder head to go further.
In my shop, a low compression reading usually points to one of three repairs. A ring job. A valve job. Or a new engine altogether. On older push mowers, the cost of parts and labor often gets close to the price of buying a new mower outright. I tell customers this straight, every time. Sometimes replacing the mower really is the smarter move, and I say so even though a repair pays my shop more.
Troubleshooting: Compression Test Symptom Table
| Symptom | Likely Cause | What to Do |
|---|---|---|
| Reading is far below spec, wet test raises it a lot | Worn piston rings | Plan for a ring job or engine replacement |
| Reading stays low even after the wet test | Bad exhaust or intake valve | Valve service needed, often not DIY-friendly |
| Reading is normal but engine still won’t start | Fuel or spark issue, not compression | Check the carburetor and spark plug next |
| Gauge needle won’t move at all | Tester not sealed, or hole cross-threaded | Reseat the tester by hand, check the threads |
| Reading is much higher than spec | Carbon buildup in the cylinder | Have a professional inspect the combustion chamber |
| Reading is normal on a cold test but drops once warm | Head gasket starting to fail | Retest cold, then plan a gasket inspection |
Total Cost of Ownership: What Low Compression Really Costs
A compression test itself is nearly free once you own the tester. A basic tester costs $15 to $25 (Amazon, 2026). [VERIFY: current price] The real cost shows up after the test, depending on what you find.
| Repair | Typical Cost Range | DIY Friendly? |
|---|---|---|
| Ring replacement | $150-$300 in parts and labor | Rarely |
| Valve service | $100-$250 in parts and labor | Rarely |
| Head gasket replacement | $80-$180 in parts and labor | Sometimes |
| New small engine (short block) | $200-$400 | Sometimes |
| New push mower (budget model) | $200-$350 | Not applicable |
This table is why the test matters so much. A $20 tester can save you from paying $250 for a valve job on an engine that’s actually worth replacing.
Think about the math this way. A ring job costs real money and takes real shop time. A new budget push mower can cost about the same, sometimes less. That’s why I always test compression before quoting any repair. The customer deserves to know both numbers before deciding. Sometimes the mower is worth fixing. Sometimes a new one is the better dollar-for-dollar choice, especially on an older engine with other wear signs too.
Expert Tip From the Shop
Most homeowners skip the wet test to save two minutes. Don’t skip it. Those two minutes tell you exactly which repair you’re facing. Guessing wrong means buying the wrong part. Sometimes twice.
Here’s a second tip few guides mention. Test compression on a mower that’s been sitting unused for months before you do anything else to it. Old fuel and a stuck valve can mimic low compression. A quick retest after fresh fuel and a few good pulls sometimes clears up a false-low reading on its own.
A third tip: keep a small logbook for mowers you own long-term. Write down the reading each time you test. A slow drop over several years is normal wear. A sudden big drop between two tests points to something breaking, not just aging. That pattern alone can guide you toward the right repair faster.
A Real Shop Example
A customer brought in a five-year-old push mower last spring. It cranked fine but wouldn’t fire. He’d already replaced the spark plug himself. It still wouldn’t start.
I ran a compression test first, before touching anything else. The reading came back at 45 psi. Spec for that engine was 90 psi. That’s half the normal number.
I ran the wet test next. The reading barely moved, up to just 50 psi. That pattern pointed to a valve problem, not worn rings. I pulled the valve cover and found a burnt exhaust valve. It wasn’t sealing at all on one side.
A valve job on that engine ran less than a new carburetor kit would have cost. Without the compression test, the next guess would have been fuel or ignition parts. Those wouldn’t have fixed a thing. The mower would have stayed broken, and he’d have spent money finding that out the hard way.
This is the exact reason I run compression first on any “won’t start” mower that has spark and fuel. It’s a five-minute test that can save an afternoon of guessing.
Who This Test Is For (and Who It Isn’t)
This test is a good fit if your mower won’t start, starts hard, or runs weaker than it used to. It’s also useful before buying a used mower, to check the engine’s real condition before you hand over cash.
This test is not the right first step if your mower simply has old fuel, a dirty air filter, or a fouled spark plug. Those are cheaper, faster things to check first. Save the compression test for when those simpler fixes don’t solve the problem.
A Note for Riding and Zero-Turn Mower Owners
The steps above work the same way on riding and zero-turn engines. A few extra points matter for these larger machines.
Riding mower engines sit under a hood or seat deck. You may need to lift or remove a panel first to reach the spark plug. Check your owner’s manual for the exact access point.
Some riding mowers have two cylinders, not one. Test each cylinder separately. Write down both numbers. A big gap between the two readings often points to a problem on just one side of the engine.
Battery-powered electric start models also need the ignition switch left off during this test, in addition to grounding the spark plug wire. This prevents any accidental spark from the ignition system while the plug is out.
Frequently Asked Questions
What is a normal compression reading for a lawn mower?
Most healthy push mower engines read 90 to 120 psi (Briggs & Stratton, 2024). Riding mowers often run higher than push mowers. Always check your engine’s own spec sheet for the exact number.
Can I check compression without a compression tester?
Not accurately. A “finger over the spark plug hole” test only tells you if there is some pressure at all. It gives no real number to compare against spec. A gauge is the only reliable way to test compression.
What does low compression mean for a lawn mower?
Low compression usually means worn piston rings, a bad valve, or a blown head gasket. A wet test narrows down which one you’re facing. Low compression engines often start hard, run weak, or won’t start at all.
Is a compression test the same as a leak-down test?
No, they measure different things. A compression test measures peak pressure built during cranking. A leak-down test holds steady air pressure in the cylinder and measures how fast it escapes. A leak-down test is more precise, but it needs an air compressor most homeowners don’t have.
How often should I test my mower’s compression?
Most mowers don’t need regular compression tests as routine maintenance. Test when the engine won’t start, runs weak, or burns more oil than before. Think of it as a diagnostic tool, not a scheduled service item.
Can low compression be fixed without replacing the engine?
Sometimes, yes. A worn ring or a single bad valve can often be repaired on its own. A cracked cylinder or a badly worn block usually cannot be fixed economically. The repair cost is what decides whether it’s worth doing versus buying a new mower.
What thread size does my compression tester need?
Most walk-behind mower engines use a 14mm spark plug thread. Some smaller or older engines use 10mm instead. Check your spark plug’s own size before you buy a tester kit.
Does a compression test drain the battery on an electric-start mower?
Cranking with a compression tester threaded in uses the same starter motor as a normal start attempt. It draws a similar amount of battery power each pull. Six pulls in a row is unlikely to drain a healthy battery, but a weak battery may struggle by the last pull.
Should I test compression before or after cleaning the carburetor?
Test compression first. A dirty carburetor and low compression can look similar from the outside. Both cause hard starting and weak running. Testing compression first rules out the bigger, more expensive problem before you spend time on the carburetor.
Will a compression test damage a healthy engine?
No. Pulling the cord 4 to 6 times with the plug out is well within normal engine operation. This is a standard diagnostic step used by mechanics and repair shops. It puts no extra strain on a healthy engine.
What if my compression tester reading won’t hold steady?
A reading that drops right after you stop pulling usually means the tester itself isn’t sealing well. Check that the tester is threaded in fully and hand-tight. A worn rubber seal on the tester gauge can also cause this. Try reseating it once before assuming the engine has a problem.
What to Do Next
You now have a real number for your engine’s health. If it matches spec, the compression problem isn’t the culprit. Check fuel and spark next. If the number is low, the wet test tells you which repair you’re facing. From there, weigh the repair cost against buying a new mower. Both are reasonable choices. The number you just measured is what makes that choice an informed one instead of a guess.
Keep your reading written down somewhere. Bring it with you if you visit a repair shop. A shop that already has your number can skip straight to diagnosing the cause, instead of repeating the test you just ran yourself.