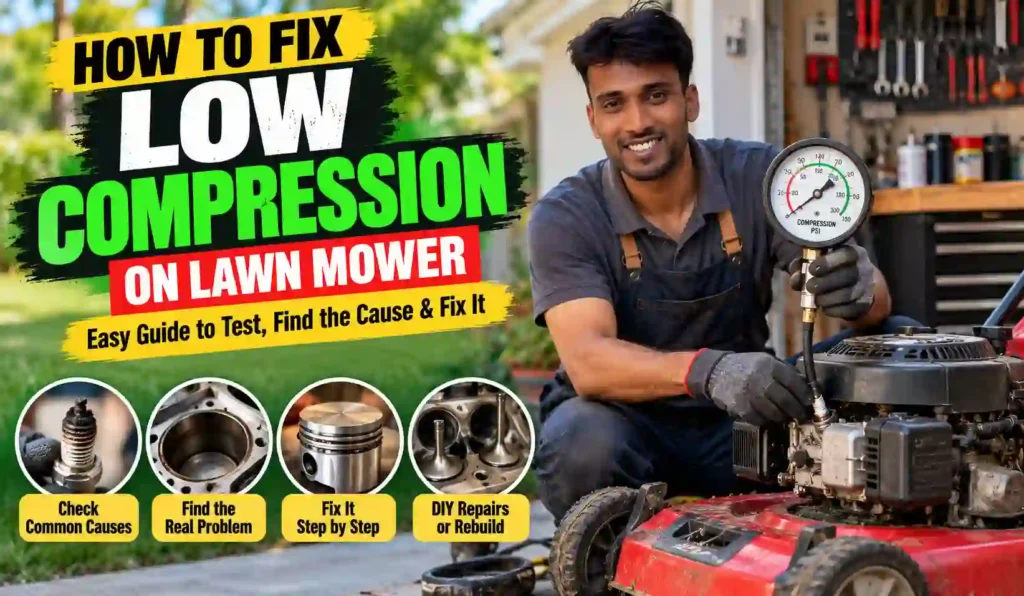
Knowing how to fix low compression on lawn mower engines starts with one fact: low compression is a symptom, and the cause decides the repair. A mower that cranks but will not start, runs weak, or has a pull cord that feels too easy may be leaking pressure out of the cylinder. This guide shows you how to test it, find the leak, and fix it, from a two-minute oil squirt to a full cylinder head job.
Quick Answer
The short answer on how to fix low compression on lawn mower engines: test with a gauge first, then match the fix to the cause. A loose spark plug, loose head bolts, a gas-washed cylinder, or carbon stuck on a valve are cheap fixes you can do at home. A leaking head gasket needs a new gasket. Worn piston rings or a worn cylinder usually mean a rebuild or a new engine.
What You’ll Need
You can do most of this job with basic hand tools and one cheap gauge. Gather everything before you start, because the engine will sit open for a while.
Tools
- Compression tester with a spark plug hole adapter
- Spark plug socket and a ratchet
- Torque wrench (inch-pound or foot-pound, to match your manual)
- Feeler gauge set for valve clearance
- Screwdrivers, plastic scraper, and a small funnel or oil can with a thin spout
- Safety glasses and work gloves
Parts
- New spark plug (the exact model listed in your owner’s manual)
- Head gasket and valve cover gasket made for your engine model
- Clean air filter if the old one is dirty or oily
Materials
- Fresh SAE 30 engine oil or the oil grade your manual lists
- Carburetor cleaner and shop rags
- Penetrating oil
- Fine valve lapping compound and a lapping stick, only if you plan to clean the valves
Find your engine model and type numbers before you buy any part. They are stamped on the engine shroud or a metal tag, and they decide which gasket and which specs apply to you.
Safety First When You Work on a Mower Engine
Treat the mower as live until the spark plug wire is off. If the engine fires while you are working, the blade becomes a hazard to your hands and feet. Fuel, hot metal, and a spinning blade make this a job where small shortcuts cause real injuries.
Follow these rules every time:
- Pull the spark plug wire off the plug and tuck it away from the plug hole before you touch anything.
- Let the engine cool for at least 30 minutes. Muffler and head metal stay hot long after you stop mowing.
- Work outside or in a well-ventilated space, away from pilot lights, heaters, and open flames.
- Ground the spark plug wire to bare metal on the engine when you crank it for a test. A loose, live plug wire can spark near fuel vapor that comes out of the plug hole.
- Wear safety glasses. Oil, fuel, and carbon can spray out of the plug hole when you pull the cord.
- Shut off the fuel valve if your mower has one. If not, run the tank low before you start.
- Tip the mower only with the air filter and carburetor facing up. Tipping it the other way sends oil and fuel into the air filter and cylinder.
Before You Start: How to Fix Low Compression on Lawn Mower Engines the Right Way
Compression is the pressure the piston builds when it squeezes the fuel and air mix before the spark. Think of a bicycle pump with your thumb over the hole. The air pushes back hard because nothing leaks out. If a hole opens in the pump, the push fades.
Before you learn how to fix low compression on lawn mower engines, you need to know where the leaks form. The cylinder seals in four places: the piston rings, the two valves, the head gasket, and the spark plug threads. A leak at any one of them drops the pressure.
These are the common signs of low compression:
- The engine cranks but will not start, even with fresh fuel and a good spark.
- The pull cord feels too light, with little push back from the engine.
- The mower starts but runs weak and bogs down in thick grass.
- Starting gets harder as the engine warms up.
- You hear a hiss from the carburetor, muffler, or dipstick tube while you pull the cord.
One caution before you test. Many modern small engines have an automatic compression release on the camshaft. It opens a valve slightly at pull-cord speed so the cord is easier to pull. A light pull can be normal on those engines, so do not judge by feel alone. A gauge reading is the only real answer.
Step 1: Rule Out Fuel, Spark, and Air Problems First
The first move in how to fix low compression on lawn mower engines is to prove compression is the problem. Hard starting has three common causes: fuel, spark, and air. Low compression is a fourth, and it is the one you test last.
Do these three checks in about ten minutes:
- Fuel: Drain old gas. Fuel that has sat for months turns to varnish and clogs the carburetor.
- Spark: Hold the plug against bare engine metal with the wire attached, pull the cord, and look for a bright blue spark. Use an inline spark tester if you have one.
- Air: Pull the air filter. A dirty or oil-soaked filter chokes the engine.
If fuel, spark, and air all check out and the engine still will not run, move on to the compression test.
Pro tip: Fix the carburetor and filter problems first. A mower can show weak power for several reasons, and you do not want to open an engine that only needed fresh gas.
Step 2: Prepare the Mower and Disconnect the Spark Plug Wire
Park the mower on a flat, hard surface and let the engine cool. Pull the spark plug wire off the plug and tape it back from the plug hole. Clean the area around the plug with a rag or a blast of air, so dirt does not fall into the cylinder when you remove the plug.
Tip the mower the right way
If you need access under the deck, tip the mower with the air filter and carburetor side facing up. Check your manual, because some models list a preferred side. Tipping the wrong way lets oil run into the air filter and the cylinder, which makes starting harder and creates smoke.
Common mistake: Skipping the plug wire. Always pull it first, even when you are “just checking.”
Step 3: Run a Dry Compression Test
A dry compression test gives you a number. Without that number, you are guessing.
Follow this order:
- Remove the spark plug with the socket and look at it. A wet, fuel-soaked tip points to flooding. A black, oily tip points to oil burning past the rings.
- Thread the compression gauge adapter into the plug hole. Snug it by hand, then a small turn with a wrench so no air leaks around it.
- Set the throttle to full open and the choke to off. A closed throttle limits air and gives a false low reading.
- Pull the starter cord briskly 5 to 6 times and watch the needle climb. For an electric-start mower, crank for about 5 seconds.
- Write down the highest number the gauge shows. Release the pressure with the gauge valve.
- Repeat once. Two matching readings are reliable.
If you do not have a gauge
You can run a rough hand check. Turn the flywheel slowly by hand and feel for resistance as the piston rises. A good engine pushes back and may even bounce the flywheel back. This check is not precise and cannot replace a gauge, so buy a cheap tester before you spend money on parts.
Pro tip: Test the engine warm if you can. Cold engines read a bit lower because the rings and oil film have not sealed yet.
Step 4: Read the Numbers and Pick Your Repair Path
The reading tells you how to fix low compression on lawn mower engines in the right order. Use the table below as a rule of thumb. The exact healthy number depends on the engine make, so check your service manual for the real spec.
| Gauge reading | What it usually means | Next step |
|---|---|---|
| About 90 psi or higher | Healthy for many small engines | Look for other problems (fuel, spark, timing) |
| 60 to 90 psi | Weak seal, engine may start but run poorly | Do the wet test in Step 7 |
| Below 60 psi | Low compression, hard starting | Work through Steps 5 to 11 |
| Near 0 psi | Gas-washed cylinder, stuck-open valve, or major failure | Start with Step 6, then Step 9 |
Engines with an automatic compression release read lower on a cranking test than the table suggests. If your manual lists a spec, follow the manual and ignore the table.
Common mistake: Testing once and trusting the number. Retest after any change, and write each reading down so you can see if a fix helped.
Step 5: Tighten the Spark Plug and Cylinder Head Bolts
A loose plug or loose head bolts can leak compression, and tightening them costs nothing. Start here because these fixes take about ten minutes.
Check the spark plug
Thread the plug in by hand until the gasket touches. Then tighten it as the plug maker’s chart says. Many gasket-type plugs need about half a turn past hand-tight, but follow the chart for your plug. Check that the plug has a gasket and that it is not cracked.
Check the head bolts
Find the bolts around the outer edge of the cylinder head. Use a torque wrench and tighten them in a crisscross pattern to the spec in your manual. Do this in small steps, a little on each bolt per round, so the head seats evenly.
Retest compression after both checks.
Common mistake: Over-tightening. Aluminum threads strip easily, and a stripped head bolt hole turns a ten-minute fix into a repair bill.
Step 6: Fix a Gas-Washed Cylinder With Oil
A gas-washed cylinder is the simplest cause and the easiest fix. Raw fuel runs into the cylinder, washes the oil film off the walls, and the rings stop sealing. The engine then pulls with almost no pressure, even though nothing is worn.
The fix takes five minutes:
- Remove the spark plug.
- Add about 1 teaspoon (5 ml) of clean engine oil into the plug hole.
- Pull the cord slowly 5 to 10 times to spread the oil around the cylinder wall.
- Install a new spark plug and test compression again.
Find out why fuel got in
If the problem returns after the mower sits for a few days, fuel is likely leaking past the carburetor float needle into the cylinder. Shut the fuel valve off after every use, or fit an inline shut-off valve. Clean or replace the float needle and seat if the leak continues.
Pro tip: Never pour a full capful of oil into the cylinder. Too much oil can lock the piston (hydrolock) and make a lot of smoke on the next start.
Step 7: Run a Wet Test to Separate Ring Problems From Valve Problems
A wet test points to the cause. Repeat the dry test with a small amount of oil in the cylinder and compare the two numbers.
- Run and record the dry test first.
- Add about 1 teaspoon of oil through the plug hole.
- Pull the cord a few times to spread the oil, then run the gauge test again.
- Compare the two readings.
If the pressure jumps clearly, roughly 10 psi or more, the rings or cylinder wall are the likely leak. The oil temporarily seals the gap. If the number stays about the same, the leak is above the piston. That points to the valves or the head gasket.
Treat the result as a hint, not proof. A leakdown tester gives a firmer answer if you have access to one. It pushes shop air into the cylinder, and you listen for where the air escapes.
- Air hissing from the carburetor points to a leaking intake valve.
- Air hissing from the muffler points to a leaking exhaust valve.
- Air from the dipstick tube points to worn rings.
- Bubbles or hiss at the head joint point to the head gasket.
Common mistake: Using too much oil, which hides the real reading and can foul the plug.
Step 8: Check and Adjust Valve Clearance
Valves that sit too tight cannot close fully, and a valve that cannot close leaks compression. Valve clearance (also called valve lash) is the small gap between the valve stem and the part that pushes it. The spec is in your manual and differs for the intake and exhaust valves.
- Remove the valve cover or side access plate.
- Turn the engine by hand until the piston is at the top of the compression stroke. Both valves are closed at that moment.
- Slide the correct feeler gauge between the valve stem and the lifter or rocker.
- Compare the gap to the spec. Adjust the screw or nut on overhead valve engines.
- Recheck the gap after you tighten the lock nut.
On side-valve engines the valves sit in the block and may need the valve stem end ground down to open the gap. If the gap is too tight and you are not sure how to correct it, stop and have a shop do it.
Pro tip: Use the exact number from your manual. Do not guess, because a wrong gap leads to hard starting or burned valves.
Step 9: Remove the Head and Clean Carbon off the Valves
Carbon is a common reason a valve stops sealing. A chunk of carbon can break loose and sit under the valve seat, or varnish from old fuel can make a valve stick. Cleaning is the main step in how to fix low compression on lawn mower engines with healthy rings.
Remove the head
- Take off the shroud, muffler, and any parts that block the head. Photograph each step.
- Loosen the head bolts in a crisscross pattern and lift the head off.
- Look at the piston top, valves, and cylinder wall for scoring, cracks, or burnt spots.
Clean and lap the valves
- Scrape carbon from the head and piston top with a plastic scraper. Metal scrapers scar the surface.
- Spray carburetor cleaner on the valve faces and seats and wipe them clean.
- If the valve seating ring looks pitted or uneven, apply a dab of lapping compound and spin the valve against the seat with a lapping stick until you see an even, gray ring.
- Wipe every trace of compound off the valves, seats, and ports before you reassemble.
Replace any valve that is bent, burned, or has a worn face. A valve spring compressor lets you pull the spring and retainer off the stem.
Common mistake: Leaving lapping compound in the engine. It is abrasive and will wear the cylinder walls fast.
Step 10: Replace a Blown Head Gasket
A head gasket seals the joint between the head and the cylinder. When it fails, pressure escapes at the joint. You may see oil or soot streaks along the gasket edge, or hear a hiss near the head while you crank.
- Remove the head as shown in Step 9.
- Scrape the old gasket off both the head and the block with a plastic scraper. Keep the surfaces clean and scratch-free.
- Lay a straightedge across the head and check for gaps with a feeler gauge. A warped head will not seal, so replace it if you find a gap beyond the manual’s limit.
- Set the new gasket on the block in the right direction. Match every bolt hole.
- Tighten the head bolts in a crisscross pattern to the torque spec in your manual.
Pro tip: Buy the gasket by exact engine model number. A gasket that looks close can still block an oil passage.
Step 11: Decide on Worn Rings or a Worn Cylinder: Rebuild or Replace
If the wet test jumped and the head and valves look fine, the problem is most likely worn rings or a worn cylinder wall. This is the point in how to fix low compression on lawn mower engines where the cheap fixes end.
Signs of worn rings include blue smoke, oil use between changes, and air leaking from the dipstick tube during a leakdown test.
Your options:
- New rings and a cylinder hone. This works if the cylinder wall has a cast-iron sleeve that is still within spec. A shop measures the bore for wear.
- A replacement engine or short block. Many mower engines have an aluminum bore with no sleeve. Those cannot be honed or bored, so a worn bore means a replacement.
- A new mower. If the deck, wheels, and frame are also tired, a new machine can cost less than a new engine plus labor.
A common rule of thumb is to replace the mower when the repair quote passes about half the price of a new, similar mower. Treat that as a guide, not a law.
Ring-seal additives
Some fuel and oil additives claim to restore compression by freeing sticky rings and filling small gaps. They may help a carbon-stuck ring on an engine you plan to retire soon. They cannot repair worn metal or a burnt valve, so treat them as a stop-gap and not a repair.
Common mistake: Buying rings before measuring the cylinder bore. New rings in a worn cylinder will not seal.
Step 12: Reassemble, Retest, and Break In the Engine
Finish by putting everything back in reverse order and checking your work. This step proves the repair worked.
- Install the new plug, valve cover, shroud, muffler, and air filter.
- Fill the crankcase with fresh oil to the manual’s level.
- Reconnect the spark plug wire last.
- Run the compression test again and compare the new number to Step 3.
- Start the engine and let it idle for a few minutes. Watch for oil leaks, smoke, and odd noises.
After a rebuild, mow lightly for the first hour and change the oil sooner than normal. Follow the break-in advice in your manual for the exact interval.
To prevent a repeat, use fresh fuel with stabilizer, shut off the fuel valve before storage, and change the oil every season. How to fix low compression on lawn mower engines matters less once you stop the causes that built it up.
Common Problems and Fixes
These are the patterns people see most when they try how to fix low compression on lawn mower engines. Match your symptom to a likely cause.
| Problem | Likely cause | Solution |
|---|---|---|
| Compression disappears after the mower sits | Fuel leaking past the carburetor float needle, gas-washing the cylinder | Oil squirt (Step 6), clean or replace the needle, use a fuel shut-off |
| Reading stays low even with oil added | Valves not seating because of carbon, bent valve, or tight clearance | Adjust valve clearance, clean and lap valves (Steps 8 and 9) |
| Reading jumps a lot after adding oil | Worn rings or cylinder wall | Rebuild or replace the engine (Step 11) |
| Oil or soot streaks at the head joint, hiss near the head | Blown head gasket or warped head | Replace the gasket, check head flatness (Step 10) |
| Hard pull with a sudden kickback, engine will not run | Sheared flywheel key throws the timing off | Replace the flywheel key and check the flywheel |
| Blue smoke and heavy oil use | Worn rings | Check the bore, then rebuild or replace |
The flywheel key row deserves a note. When the blade hits a rock or stump, the small key that locks the flywheel to the crankshaft can shear. The engine then fires at the wrong time, and it feels like low compression even though the cylinder is fine. Check the key before you open the head if the trouble started after a blade strike.
Troubleshooting a Fix That Did Not Work
If the test still reads low or the engine still will not run, look at the three most likely failure points below.
Compression returns, then disappears again
This usually means a valve is sticking from varnish or carbon, or fuel is washing the cylinder after each shutdown. Clean the valve stems with carburetor cleaner, work the valves up and down, and flush them with penetrating oil. Fit a fuel shut-off and test the float needle. Replace the valve guide or valve if the stem is bent or worn.
The gauge reads normal but the engine will not start
If compression is healthy, the problem lies elsewhere. Check the flywheel key, the ignition coil air gap, the kill switch wire, and the carburetor jets. A good gauge reading means the cylinder is sealing, so stop opening the engine.
The reading is still low after a head job
Check the basics again. Look for a gasket installed backward, a misaligned bolt, a valve that is not seating because of leftover compound or tight lash, and a plug that is loose. Retorque the head bolts in order. If everything checks out, the cylinder wall or rings may be the real leak and the head work only addressed a second cause.
Many engines have two problems at once, such as an old head gasket and carbon on a valve. Fix one, retest, and keep going until the number reaches spec.
Expert Tips on How to Fix Low Compression on Lawn Mower Engines
These habits save time, parts, and money.
- Take photos before you remove any part. A phone picture of the linkage and bolt layout saves an hour at reassembly.
- Write down every compression reading with the date of the test. A slow drop over seasons tells you the engine is wearing out, while a sudden drop points to a single failed part.
- Test and repair the cheap causes first. A plug, a teaspoon of oil, and ten minutes should come before any gasket or rings.
- Change the oil and clean the air filter every season. Dirt in the intake wears rings faster than anything else.
- After any blade strike, check the flywheel key before you buy parts.
When to Call a Professional
Some jobs need measuring tools and shop experience. Stop and get help when you see any of these signs:
- The cylinder wall has deep scratches or a visible ridge.
- You find metal flakes in the oil or on the oil dipstick.
- The engine knocks or rattles, which can mean a bent rod or a failing bearing.
- A valve is bent or broken and you are not comfortable replacing it.
- The head is warped or cracked.
- The mower is still under warranty. Check the warranty terms before you open the engine, since DIY repairs can change coverage.
A shop can measure bore wear with proper tools and tell you if a rebuild is worth it. That saves you from buying parts for an engine that cannot be saved.
Frequently Asked Questions
What is a good compression reading for a lawn mower?
Many small engines read around 90 psi or higher when healthy, and readings below about 60 psi usually cause hard starting. The right number depends on the engine make and whether it has an automatic compression release. Use the spec in your service manual if one is listed.
How long does it take to fix low compression on a lawn mower?
Plan on 15 to 30 minutes for a test and a plug or oil fix. A valve clearance check takes about an hour. A head removal, carbon cleaning, and gasket job can take an afternoon for a first-timer.
Can I skip a step when learning how to fix low compression on lawn mower engines?
You can skip the repair steps that do not apply to your reading. You should not skip the compression test, the safety steps, or the retest at the end. Those three steps keep you safe and prove that the repair worked.
Can low compression fix itself?
It can after a gas-washed cylinder, because oil slowly coats the wall again after you pull the cord several times. A worn ring, a burnt valve, or a blown gasket will not heal on its own. Test again after any improvement, since the problem will return if the cause is still there.
Is it worth fixing a lawn mower with low compression?
It depends on the cause and the mower’s value. Cheap fixes like a plug, an oil squirt, or valve cleaning are almost always worth doing. Worn rings or a worn bore often cost more than half the price of a new mower, so compare the quote before you commit.
What if my mower still won’t start after I try every fix?
Retest compression and confirm it meets spec. If it does, the problem is fuel, spark, or timing, so check the carburetor, ignition coil, and flywheel key. If compression is still low, the engine likely needs a rebuild, a replacement engine, or a new mower.
Final Takeaway
Low compression has a short list of causes, and most are fixable at home. Test with a gauge, run a wet test to narrow the cause, and start with the cheap fixes: a tight plug, tight head bolts, and a teaspoon of oil. Then move to valve clearance, carbon cleaning, and the head gasket. If the rings or cylinder wall are worn, compare the repair cost to a new engine or mower. Following how to fix low compression on lawn mower engines in this order keeps you from spending money on parts you do not need.
Why Trust This Guide
This guide comes from Siddik Kazi, who runs a lawn mower repair service in Italy. The repair steps reflect the way small engines are diagnosed and rebuilt in a working shop.
Sources and methodology: This guide is based on manufacturer service-manual practice for small engines, a review of existing repair coverage of the topic, and analysis of owner-reported problems. It explains standard test and repair methods and does not describe a hands-on test of a specific mower model. Always follow the torque values and specs in your own engine’s manual.