Quick Overview
- Striped lawns come from bending grass blades in opposite directions so light reflects differently, not from cutting grass at different heights.
- You need a roller (built into the mower or a separate attachment) weighing roughly 15 to 25 kilograms, plus a mower cutting at 6 to 9 centimeters for cool-season grass.
- The basic pattern takes five steps: mow a straight border, lay parallel passes, turn cleanly at each end, cross-mow every second or third cut, and touch up the edges last.
- Dull blades and an unlevel deck are the most common reasons stripes look patchy, according to repair-shop intake patterns at MowerInsights.
- Alternate your stripe direction every one to two mowing sessions to prevent the grass from developing a permanent lean or thin wear tracks.
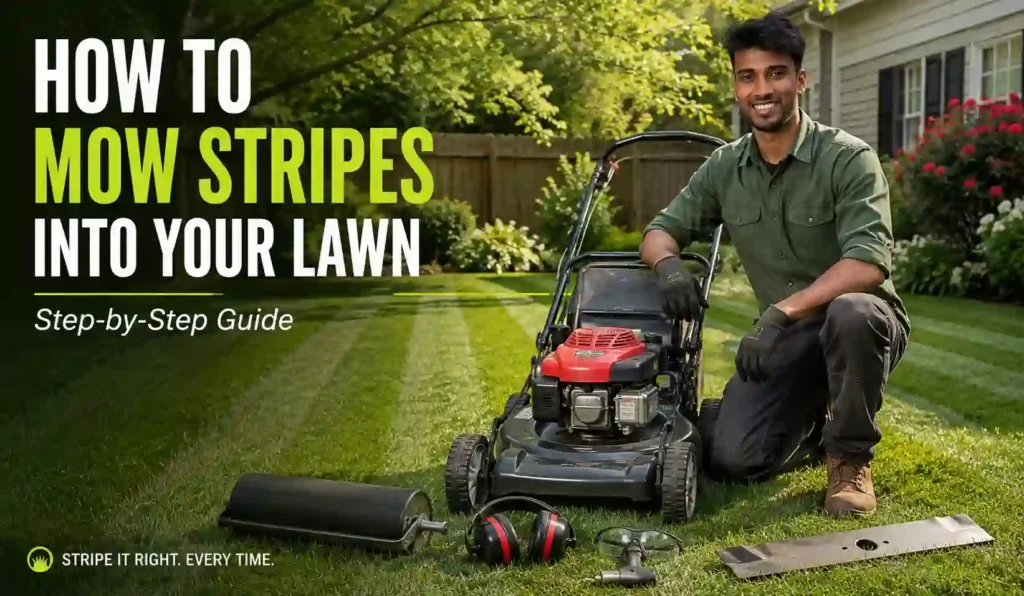
What You Need Before You Start
Striping a lawn needs three things: a mower with sharp blades, a way to bend grass (a roller or a heavy drag attachment), and a grass type that holds a bend. Skip any one of these and the pattern will look faded or uneven within a day.
Tools and materials:
- A mower with a roller built into the rear of the deck, or a roller/striping kit attachment that bolts to an existing mower
- A blade sharpened within the last 8 to 10 mowing hours (dull blades tear grass tips, which scatters light instead of reflecting it cleanly)
- A tape measure or string line for your first few passes, until you can eyeball a straight line
- Grass at least 6 to 9 centimeters tall for cool-season species (fescue, ryegrass, bluegrass) or 4 to 6 centimeters for warm-season species (Bermuda, Zoysia)
- 30 to 60 minutes depending on lawn size, since a rushed first pass usually means redoing the border
How Lawn Striping Actually Works
Stripes are an optical effect, not a pattern cut into the turf. When grass blades bend away from you, the wider, lighter underside of the leaf reflects sunlight back toward your eye, so that strip looks pale. When blades bend toward you, you see the darker top surface, so the strip looks deep green.
A roller is what forces that bend to hold. Without one, a rotary mower’s airflow flattens the grass for a second or two and it springs back up almost immediately, which is why a bagless rotary mower with no roller rarely produces a visible pattern that lasts more than a few minutes.
Reel mowers with a rear roller create the crispest, most consistent stripes because the roller runs directly behind the cutting cylinder on every pass (Toro, 2024). Rotary mowers with a roller kit come close, but the effect is slightly softer because the roller sits a bit further back from the blade.
Grass species matters more than most guides admit. Cool-season grasses like tall fescue and Kentucky bluegrass have broad, flexible blades that bend easily and hold that bend for days, which is why golf courses and sports fields in temperate climates show such sharp patterns. Warm-season grasses like Bermuda and St. Augustine have stiffer, narrower blades that spring back faster, so stripes on those lawns tend to fade within a day or two even with a proper roller. This isn’t a flaw in technique, it’s a property of the grass itself, and it explains why a homeowner in Florida and a homeowner in Ohio can follow identical steps and get different results.
Soil moisture plays a smaller but real role too. Grass growing in slightly compacted or dry soil tends to hold a mowed bend a bit longer than grass in loose, well-watered soil, simply because the blade has less spring-back tension. That’s not a reason to withhold water from your lawn, but it does explain why stripes sometimes look crisper in late summer than right after a wet spring.
Step-by-Step: Mowing Your First Striped Pattern
Step 1: Mow and Sharpen First, Stripe Second
Cut the lawn to your normal height before attempting any pattern. Striping over long, uneven grass just bends uneven grass, and the result looks messy no matter how straight your lines are. Confirm the blade is sharp, since a torn blade tip won’t hold a bend the way a clean-cut blade will.
Step 2: Establish a Straight Border Line
Pick the longest, straightest edge of your yard, usually along a driveway, fence, or sidewalk, and mow one pass along it at a slow, steady walking speed. This border becomes the reference line every other pass follows, so take your time here. A string line staked at both ends helps if your yard has no straight edge to follow.
Step 3: Lay Parallel Passes Across the Lawn
Turn 180 degrees at the end of your first pass and mow back alongside it, overlapping the previous pass by about 5 centimeters so you don’t leave a thin unmown strip between rows. Keep repeating this across the width of the lawn. Walking speed matters more than most people expect: moving too fast skips the roller over the grass instead of pressing it flat.
Step 4: Turn Cleanly at Each End
Lift or slow the mower slightly as you approach the end of each row, then pivot rather than swinging wide. Wide, looping turns crush a curved patch of grass at both ends of the lawn that shows up as a rounded smudge instead of a crisp stripe edge.
Step 5: Cross-Mow for a Checkerboard, or Skip It for Straight Stripes
For straight stripes, stop after Step 4. For a checkerboard pattern, mow the entire lawn again at a 90-degree angle to your first pass, using the same border-then-parallel-rows method. The two passes compress the grass in a grid, producing the classic checkerboard look seen on sports fields.
Step 6: Touch Up Edges and Odd-Shaped Sections
Finish borders, tree rings, and any curved bed lines last, mowing them in short, controlled strokes that follow the curve. Doing edges first tends to blur straight lines laid down afterward.
Step 7: Let the First Pattern Set Before Judging It
Stripes usually look their sharpest from a slight distance and a low angle, such as from a porch or upstairs window, rather than standing directly over the lawn. If the pattern looks weak up close but you can see clear banding from across the yard, the technique worked. Give it a full mow cycle or two before deciding whether to adjust anything, since a first attempt on a lawn that’s never been rolled before often looks better on the second or third mow as the grass adjusts to being bent regularly.
Total Cost of Ownership: What Striping Actually Adds Up To
Striping itself costs nothing beyond the equipment. The real ongoing cost is mowing frequency, since a lawn kept at proper striping height needs cutting roughly every 5 to 7 days during peak growing season instead of every 10 to 14 days for a lawn mowed short and infrequently.
Typical added costs for a mid-size residential lawn (under 500 square meters):
- Aftermarket roller kit: $80-$250 one-time cost, plus 15-20 minutes of install time
- Extra fuel or battery charge cycles from more frequent mowing: roughly $30-$60 per season for gas mowers, less for electric
- Blade sharpening, which matters more for striping than for a standard cut: budget for sharpening every 8-10 mowing hours instead of stretching it to 20+ hours, adding maybe one extra sharpening service per season at $10-$20
- No added cost for the mower itself if it already has a factory roller
For a lawn under about 250 square meters, a $30-$60 drag mat is often a smarter starting point than a roller kit. It won’t produce the same contrast as a true roller, but it lets a homeowner confirm they actually like maintaining a striped lawn before spending more on a kit.
Common Mistakes That Ruin Stripe Quality
- Mowing too fast: A roller needs contact time to bend grass flat. Rushing a pass at high throttle produces faint, inconsistent stripes even with the right equipment.
- Cutting too short: Grass under about 5 centimeters doesn’t have enough blade length to bend and hold a visible angle, so the stripe effect disappears almost entirely.
- Skipping blade sharpening: A dull blade shreds the grass tip instead of slicing it, and shredded tips brown within a day, which dulls stripe contrast fast.
- Overlapping unevenly: Uneven overlap between passes leaves faint seams where two stripes don’t quite meet, visible as a thin, off-color line.
- Mowing the same direction every time: Repeating one direction for weeks trains the grass to lean permanently and can thin the turf along the same wear lines, according to repair-shop observations of customer lawns that come in with bald streak patterns.
In the shop, the most common reason a customer says their mower “stopped striping” is a deck that’s gone slightly out of level after hitting a curb or root, not the roller itself. An unlevel deck cuts one side lower than the other, and that uneven cut line breaks up the light-reflection pattern the same way a dull blade does.
- Ignoring roller pressure adjustments: Some striping kits let you adjust how hard the roller presses down. Too light and the grass barely bends; too heavy and it can rut a soft or recently watered lawn. Start at a mid-range setting and adjust based on how the first pass looks.
- Striping wet grass: Wet clippings clump under the roller instead of bending cleanly, which drags the roller unevenly and leaves streaks. Wait for the lawn to dry, typically mid-morning once dew has cleared.
- Forcing a pattern onto an oddly shaped yard: Trying to run full-length straight rows across an L-shaped or heavily landscaped yard usually produces awkward half-rows. Breaking the yard into logical straight sections, mowed independently, looks cleaner than forcing one giant pattern.
Which Mower Setup Actually Stripes Well
Not every mower produces stripes equally well, and this is where most articles gloss over the mechanics. The table below breaks down what to expect from each setup.
| Mower Type | Stripe Quality | Typical Cost to Add Striping | Notes |
|---|---|---|---|
| Reel mower with rear roller | Excellent, sharpest contrast | Often built in; standalone reel mowers run $300-$1,200 | Best for low-cut, high-traffic lawns like fescue or Bermuda |
| Rotary mower with factory roller | Very good | $0, included on models like Toro TimeMaster or Honda HRX with roller kits | Roller sits behind the blade housing, slightly softer lines than a reel mower |
| Rotary mower with aftermarket roller kit | Good | $80-$250 for a bolt-on kit | Works on most walk-behind rotary decks; check deck clearance first |
| Rotary mower, no roller, drag mat towed behind | Fair, fades within hours | $30-$60 for a homemade or store-bought drag mat | Best low-cost option for testing whether you like the look before buying a kit |
| Riding mower or zero-turn with striping kit | Very good on large lawns | $150-$400 depending on deck width | Faster coverage, but turning radius makes clean 180-degree turns harder to master |
Prices above reflect typical retail listings as of 2026 and should be reconfirmed close to publish date.
A note on reel mowers versus rotary mowers for striping: Reel mowers cut with a scissor action between the cutting cylinder and a fixed bed knife, which shears the grass cleanly and leaves less tip damage than a rotary blade’s impact cut. That cleaner cut is part of why reel-mower stripes photograph so sharply on golf courses and sports fields. The tradeoff is that reel mowers struggle with anything beyond light, frequent cutting, so they’re a poor fit for a lawn that gets mowed every other week rather than every 5 to 7 days. Most homeowners get a better return from a quality rotary mower with a roller kit than from switching to a reel mower purely for stripe quality.
Riding mowers and zero-turns deserve a specific caution: their turning radius makes the pivot-turn technique in Step 4 harder to execute cleanly. A zero-turn can spin in place, which sounds like an advantage, but spinning too sharply at the end of a row scuffs a rounded patch of grass exactly like a wide rotary turn does. Slow the turn down rather than relying on the tight radius.
Safety Notes
- Keep hands and feet clear of the discharge chute when attaching or adjusting a roller kit, and disconnect the spark plug wire or battery key first.
- Rollers add weight to the rear of the mower, which changes braking distance slightly on slopes. Avoid striping on grades steeper than about 10 degrees until you’re familiar with how the added weight handles.
- Check that the roller kit’s mounting hardware doesn’t interfere with the rear discharge guard, since a loose guard is a common cause of debris kickback.
When to DIY vs When to Call a Lawn Care Professional
Striping is a technique, not a repair, so most homeowners can learn it directly on their own mower within one or two sessions. Call a professional instead if the mower’s deck is visibly bent or uneven side-to-side, since striping will only make an existing mechanical problem more obvious rather than fixing it. A repair shop can check deck level and blade balance in about 15 minutes, which is worth doing before buying a roller kit if your current cuts already look uneven.
Troubleshooting: Stripes Not Showing Up
| Problem | Likely Cause | Solution |
|---|---|---|
| Stripes fade within an hour | Grass cut too short, or no roller weight behind the blade | Raise cutting height and confirm roller weight is 15-25 kg |
| Stripes look patchy or torn | Dull blade shredding grass tips | Sharpen or replace the blade before the next mow |
| One side of the stripe is darker/uneven | Deck is out of level | Measure deck height at all four corners and adjust to match |
| Stripes disappear after rain | Wet grass springs back faster and resists bending | Wait until grass is dry, ideally mid-morning after dew clears |
| Pattern looks fine up close but not from a distance | Rows aren’t straight or overlap is inconsistent | Use a string line for the first three or four passes to retrain your eye |
Frequently Asked Questions
What makes a lawn look striped when you mow it?
Stripes come from grass blades bent in alternating directions, not from different cut heights. Light reflects off the underside of bent grass differently depending on which way it leans, creating the light and dark bands.
Do I need a special mower to stripe my lawn?
You need a roller, either built into the mower deck or added as an aftermarket kit, weighing roughly 15 to 25 kilograms. A rotary mower without any roller will produce only a faint, short-lived pattern.
How short should I cut my grass for stripes to show?
Cool-season grass like fescue or bluegrass needs to stay around 6 to 9 centimeters tall, and warm-season grass like Bermuda or Zoysia around 4 to 6 centimeters. Cutting shorter than that leaves too little blade length to bend and hold a visible angle.
How often should I change my mowing direction?
Alternate direction every one to two mowing sessions. Mowing the same direction repeatedly can train the grass to lean permanently and wear thin along the same tracks over a season.
Can I stripe a small or oddly shaped lawn?
Yes. Mow the longest straight section first as your reference line, then work outward. Curved beds and corners are handled last with short, controlled strokes rather than forced into the straight pattern.
Why did my stripes look great last year but not this year?
The most common cause seen in repair shops is a deck that’s shifted out of level, often from hitting a curb, root, or uneven ground over a season of mowing. Blade dullness is the second most common cause.
Does striping damage the lawn?
Striping itself doesn’t damage healthy turf, since bending a grass blade is a normal part of mowing and the blade recovers within a day or two. The real risk is mowing the exact same direction for an entire season, which can wear thin, slightly compacted tracks into the soil where the wheels and roller repeatedly travel the same line.
Can I stripe with a push mower that has no engine?
Yes, as long as it has a rear roller. Manual reel push mowers with a roller are actually a common choice for small urban lawns that want a striped finish, since the scissor-cut action leaves a clean, stripe-friendly edge on each blade of grass.
What’s the difference between straight stripes and a checkerboard pattern?
Straight stripes come from one set of parallel passes in a single direction. A checkerboard comes from mowing the entire lawn a second time at a 90-degree angle to the first pass, which compresses the grass into a grid instead of straight bands.
Summary
- Stripes come from bending grass blades in opposite directions, which is why a roller matters more than any specific mower brand.
- Cut at the right height for your grass type, keep the blade sharp, and mow the border first as your reference line.
- Overlap passes by about 5 centimeters, turn cleanly at row ends, and cross-mow only if you want a checkerboard.
- Alternate direction every one to two sessions to protect turf health.
- If stripes fade fast or look uneven, check deck level and blade sharpness before assuming the roller is the problem.
How this guide was put together: These steps reflect standard technique used across lawn care and turf maintenance, cross-checked against Siddik Kazi’s repair-shop observations of what actually breaks a striping pattern on real customer mowers – deck level and blade condition, more often than the roller itself.
Pingback: How to Edge a Lawn Like a Pro Fearless